CR10S-S5 followup
A Followup on the CR10S S5
So I’ve been tinkering with the printer for about a week now. All of my planned upgrades have come in and some of them ended up not needing to be upgrades, I’ll talk more in detail about that below. For those not wanting to read the whole article, the short of it is I’ve pretty much dialed in the settings with the new extruder/hotend using 3mm filament, and I am impressed with the results. They will probably never match the quality of the Ultimaker I have, but there is also a huge price difference between the two, even after all of my upgrades.
The Upgrade Results
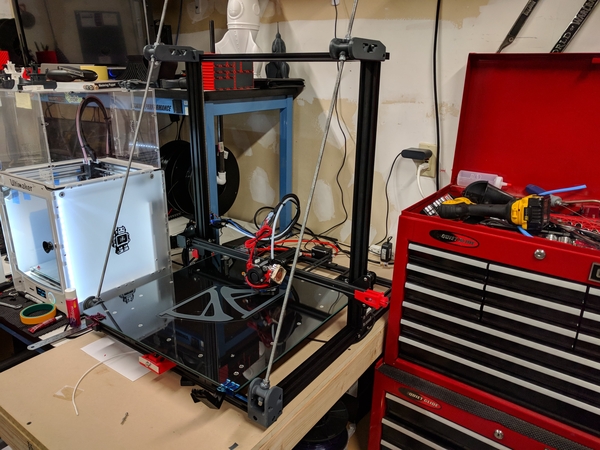
I don’t have tons of pictures to show of the before, because I was impatient and just started working, but I have included some after shots!
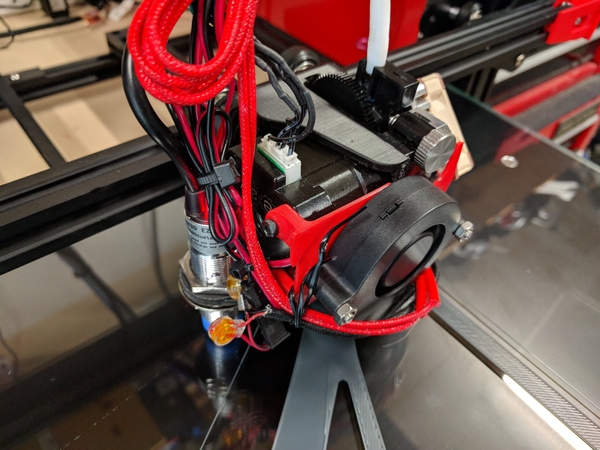
Titan Aero and Volcano
This combination rocks pretty hard. It does add weight to the carriage as you need to but a NEMA17 stepper on the Titan Aero, but it is a much nicer setup than stock. If you are worried about the weight and don’t want a direct drive extruder, you can always just use a V6 instead of the Titan and stay with the bowden setup.
Oddly enough I still have my bowden tube hooked up to guide the filament from the same spot, it is just setup to pull through it now. I’m not sure I’ll keep it like this but it works well for now.
Noctua Heatsink Fan
This one wasn’t on my original list, but the stock E3D fan is loud, I swapped it for a 40x40x10 Noctua fan, which pushes almost as much air but is dead silent. If you plan to sit around this machine a lot then it is a worthy upgrade, and that is to any E3D hotend.
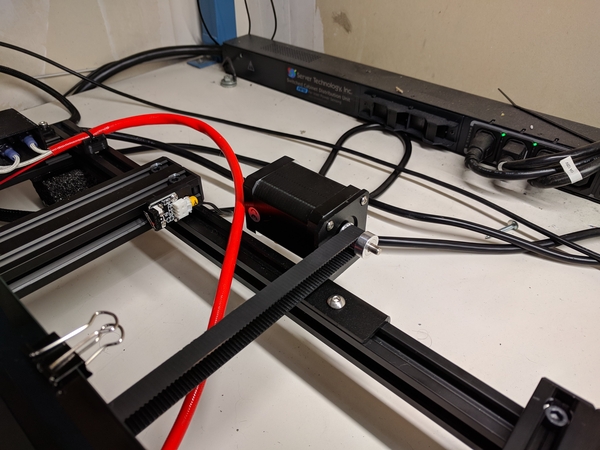
Y Axis Stepper
My biggest problem was that anything above 60mm/s caused the Y axis to skip, without fail. While I don’t plan on printing at 90mm/s normally, I like to have that option open to me. My first attempt to resolve this was bumping up the vRef for the Y axis, which did help. I was able to get no skipping at 60mm/s, whereas before it would still skip on prints that had a lot of movement on that axis.
Next I ordered a stronger (or at least I assumed) stepper motor from E3D, the Super Whopper. It has about the same profile as the stock motor, but I couldn’t find the exact specs on the stock one. After the upgrade I put it through the ringer and pushed out a benchy at 90mm/s, no skipping! Hell the motor isn’t even warm so I could push more voltage through it, but I’ll just leave it as is for now to not push my stepper driver too hard.
Now that print came out pretty terrible, but it did successfully print, which is the important part. Again I don’t plan to print at that speed, but the fact that I can means I have overhead now, and am more likely to succeed at 60mm/s or less.
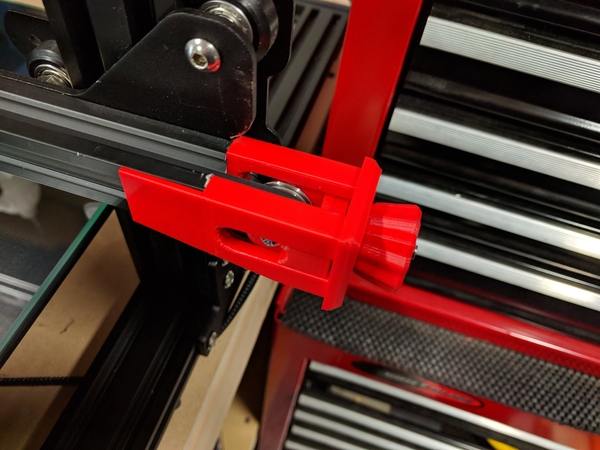
Axis Tensioners
On both axis I printed out new belt tension adjusters. This gave me more fine control over how much tension, and let me put more on the belts to reduce the amount of wiggle when things switch directions. Here are links for the Y axis and the X axis.
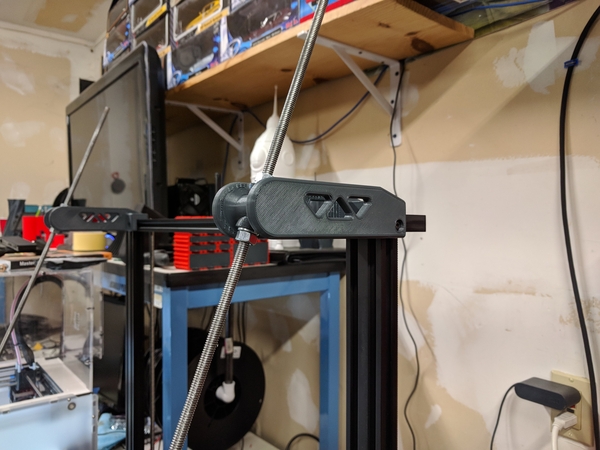
Gantry braces
As I started to print taler and taller things, I noticed that the print quality degraded quite a lot as it got above ~150mm tall. The S5 is just too tall for a simple gantry to work really well. So I initially printed this stiffener, but found with my modifications to the hot end it would hit the threaded rod.
So I moved over to this one which I had originally avoided as it looked like it would result in a large amount of Z-height loss, turns out it actually has less than the previous one. I also happen to think it looks awesome.
TH3D Firmware
This firmware, or something else aftermarket is worth installing. It let’s you further tweak pretty much any setting and unlocks some features that aren’t in the stock firmware. You will loose the power outage continuation feature, but if you are printing with Octoprint you are going to loose it anyway as that feature only works from the SD card.
TH3D EZABL and Hard Bed Mounts
I also upgraded to an auto bed leveling sensor, specifically the one from TH3D. Alongside it I bought some hard mounts to replace the bed leveling springs. I noticed that when the bed switched directions it would compress the springs a bit and cause problems in the print, in some cases catching the print and breaking it.
I had to make some adjustments to the mount on thingiverse so the EZABLE would fit with my full size stepper motor on the Titan, but aside from that it was simple to install and setup, just follow their guides.
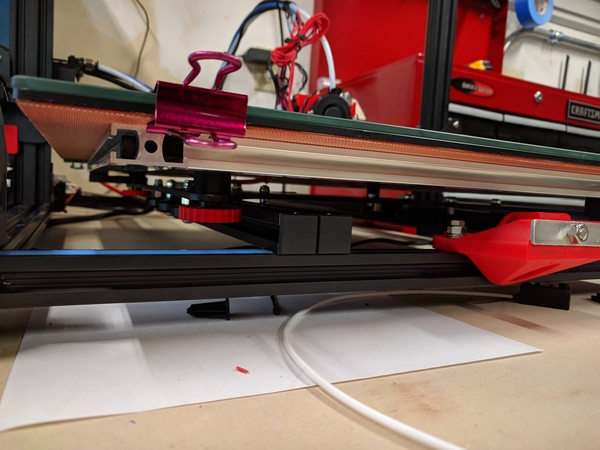
AC Heated Bed
Arguably the best upgrade out there for any of the CR10/CR10S. This bed takes less time to heat to 60C than my nozzle does to 210C. It is awesome, and it holds its temperature extremely well. A must have for these printers.
Larger Knobs for Leveling
The knobs are quite difficult to get to on the S5, and you unfortunately can’t use the same larger knobs that the other models use due to the dual rails on the S5. There are a few options out there though that are built to work with the S5 and are worth printing a set of. I still keep them on even with the leveling springs removed as it makes it easier to verify they are still tight.
Here you can see the silicone heater, the larger knobs, and the hard mounts where the springs used to be. They are printed in ABS and have an aluminum instert.
Belts
Well it turns out the belts are already fiber reinforced, so now I have replacement belts laying around. I might still try to find some better belts to use, but until I can find a 10mm wide I’ll stick with what I’ve got.
Foam Feet
Again, not something that was on my radar. I was convinced that people who put their printers on foam feet were nuts, it causes the whole damn thing to jiggle! But in my research to try to reduce ghosting from this huge buildplate I cam across this video, and explaining a bit about how if the whole printer shakes at the same rate it has no negative effects on the print. Since this is basically a zero cost mod I cut up some foam from the packaging this came with, they are about 2" tall, and ran a print, and I’ll be damned it did reduce ghosting/ringing significantly. It also made the printer a bit quieter, so bonus!
Since I moved the printer to a new table I built for it I have not put new foam feet under it, I think they help when no other mods are installed, but once you have the gantry braces, and bed leveling springs removed it seems to not really help much.
More Planned Upgrades
I do still plan to do some more upgrades to the CR10S. I want to reinforce the gantry, but haven’t decided which design I’m most fond of. Concentrating on making the frame as sturdy as possible so the whole thing acts as a single unit will probably be one of the more helpful things I can do for tall prints.
I’m still contemplating if changing to a lead screw (actually have the screw) for the Y axis is worth it. I could still hit 60mm/s, and there should be zero ghosting on that axis after. But I’m not sure it is worth the effort to make that upgrade and recalibrate the steps for that axis after all of the aforementioned upgrades.
I’ve also been looking at the Hiwin rails to replace the 20x20 extrusion for the x axis. It is a bit flimsy and I feel like this could make a big difference, but they are very expensive.
Some Tips for Volcano Owners
- Calibrate your E steps
- No really, go calibrate your E steps
- Calibrate your extrusion width
- Linear advance is very helpful in getting cleaner walls
- Turn on in Simplify3D
- Retraction
- Wipe
- Retract on wipe
- Coast
- Get a set of hardened nozzles ASAP
- Get a 0.4mm nozzle
- There is no reason you can’t still do regular prints on a properly setup Volcano, so get a range of nozzles to use
- Setup a profile for each nozzle size you use commonly, there are variations especially from 0.4mm to 1.2mm
- Prepare to print a lot of benchys and test prints, it does take some patience to get it dialed in