Cr10 Hemera
Upgrading the Franken-CR10S to use the new Hemera
In this post I’m going to talk a bit about my migration away from the dual E3D Volcano setup I’ve been using on my Frankensteined CR10S and over to the Hemera from E3D. This is notable for me for a couple of reasons.
First, the dual extrusion setup is less optimal than I liked, it worked most of the time but was always a hassle to get working properly and too many variable to go wrong. Second, I modified this CR10S to run 2.85mm filament, as my other printer is an Ultimaker, and therefore I have a ton of 2.85mm laying around and did not want to start stocking 1.75mm as well.
First, an update of other mods since my last post
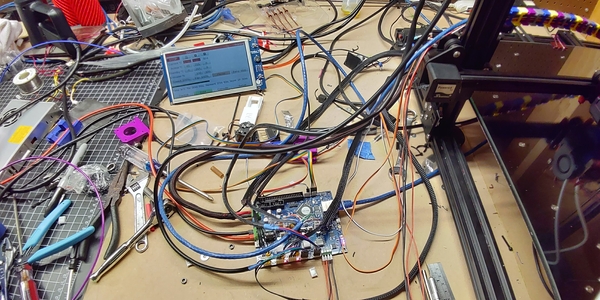
I realized I never did an update about some of the above changes. After tinkering around with the CR10S one thing I started to get frustrated with was the brain. Going to a dual extruder with it was going to be kind of a pain, and the stepper drivers were sub par. So I upgraded it to a Duet2, and basically fell in love with that board and plan to use it in a future build. I upgraded not just the board but also got a 7" touchscreen for it as well, made working with the printer so much easier.
Some in progress shots, wires everywhere!
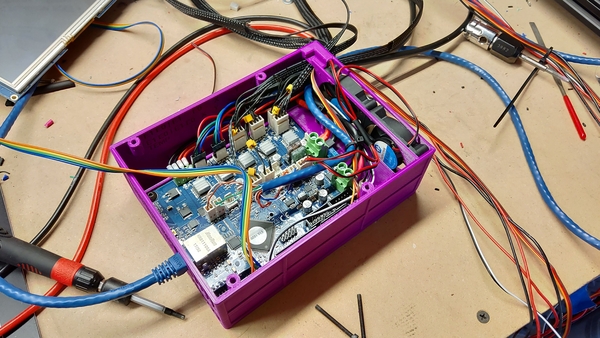
Getting better.
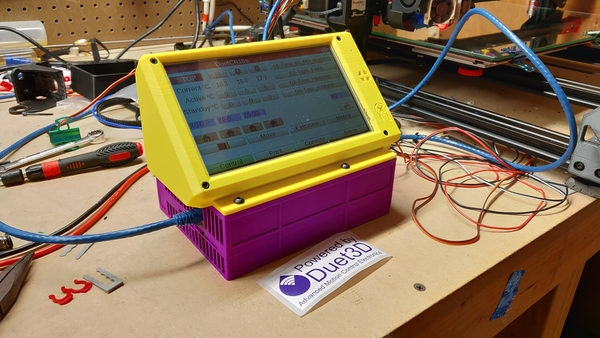
Very nice…
Next was going to dual V6 hotends, well I say next but it wall all at the same time, as the Titan was a bit underwhelming. I built some Bondtech clones With genuine Bondtech gears. The 5:1 planetary gears on the steppers gave some serious torque which was needed for the long bowdens, 2.85mm filament, and the Volcanos.
I also got fed up with the EZABL, it was not so easy in my opinion. I grabbed a BLTouch and have had much better luck with it.
I found that the Z axis was coming out of alignment all..the..time. So I tied the two together with a timing belt on top, it hasn’t come out of alignment since. This was just a couple big GT2 pulleys at the top with some bearings to keep the lead screws in place, plus a tensioner at the top.
Somewhere along the ride I bought some cheapo linear rails off AlliExpress and mounted the bed to them which overall turned out quite well, the bed is much more stable, and easier to move around. The upgrade was easier than I anticipated, but was still a bit of a pain.
What triggered the change?
The nail in the coffin so to say was Makerbox (awesome service btw) is going to ramp down their 2.85mm offering as they are consistently having issues finding the filaments in that size. I love the service and wanted to continue using it. I’ve also been following the Hemera for awhile, funny enough the unit I got is actually branded Hermes. If you haven’t been following its development, E3D was forced to rename the product by some company to Hemera, but there was a run of some units branded with Hermes.
Thankfully a few things were in my favor, the Volcano (well any heater block really) just needs a properly sized heatbreak and nozzle, so I didn’t need to buy a new Volcano block and the Hemera comes with a heatbreak, though I’d like to upgrade to a titanium one once they are available. E3D also made a big push to get folks to make STLs for various mods to this unit so things are abundant. So just a few new brass nozzles to get started and away I went!
The road to 1.75mm
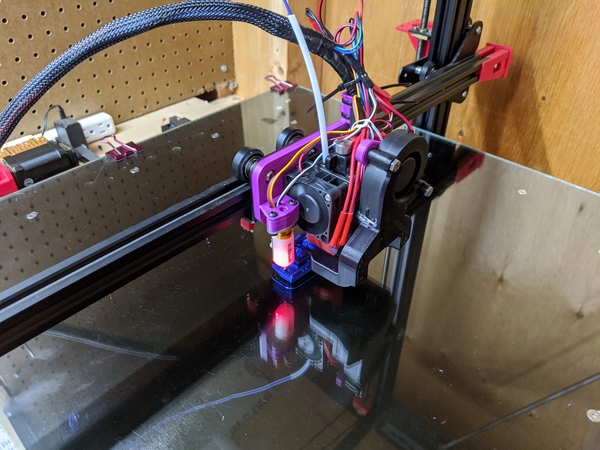
So I ordered one and started printing the parts needed to fix it to my CR10S, as the carriage is still the stock one, for now, I used the model from 3DMaker Noob you can see his video which also has links to the STLs. However I did not like his fan solution so I scoured Thingiverse and found one I liked to replace it.Thankfully it had a volcano option as well.
I printed the base plate in PLA as it is not close enough to anything hot to make a difference. The fan ducts though I printed in Taulman Aloy 910. I’ve made a habbit out of this lately as it seems to have great heat resistance, and is super durable. PET would probably work just fine as well but I like having an excuse to print me some nylon blends.
I took this opportunity to clean up my wiring a bit as well. I highly suggest using connectors at the hot end for all your cabling. It has saved me such a headache when changing things around to be able to simply disconnect a few wires and be able to free parts.
This was probably the easiest upgrade I have done, literally took me an afternoon to go from my dual setup to the hemera and have decent looking prints, tuning took a bit longer.
Calibrating
This is also known as, print a shitload of benchys. I stole some 50g samples from my dad (thanks dad!) to get me going until my rolls arrived. In reality I only printed about 10 to get where I wanted to be. Initially I printed a couple just to verify things were working, and going off of some suggested values for eSteps and whatnot. I did go through and calibrate my eSteps, which came out to 397 if you are interested.
Then I went through and tried Duets Pressure Advance (PA) calibrations. I had trouble getting this to work on my 2.85mm setup for some reason, but with this setup I got it dialed in pretty quick. The amazing part is I ended up turning retrations OFF, with a Volcano! I am actively tweaking the amount of PA as I see prints and might end up needing to put the retrations back on, but this was a first for me.
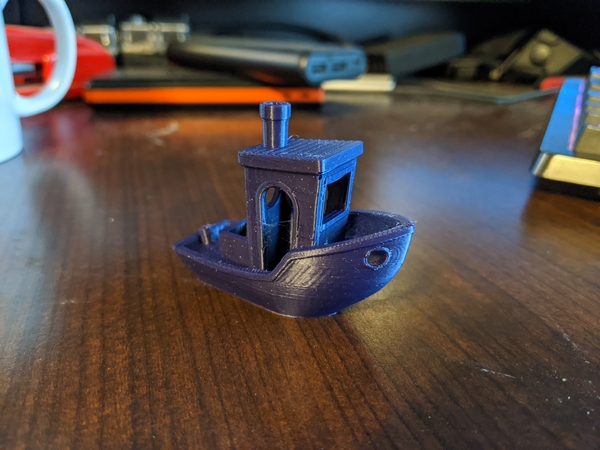
Some ghosting at the “railing”
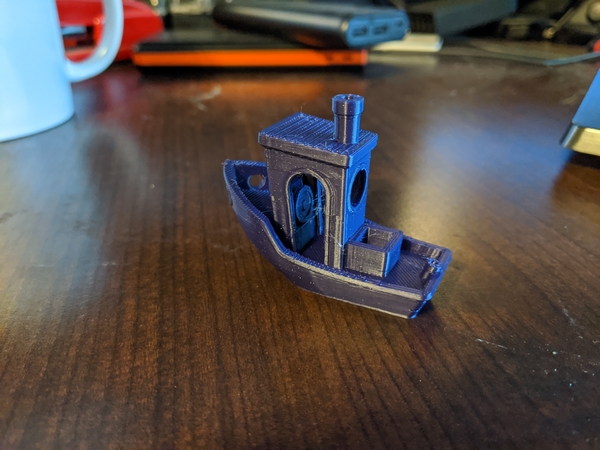
Here you can see some stringing in the cabin
The one thing I can’t get rid of is that ghosting from the enormous bed. I have the jerk and acceleration set to reasonable rates to bring it down a bit, and all of the changes like hard mounting the bed and getting the linear rails also helped to reduce it. Next is to get a lighter carriage from TinyMachines if it ever gets in stock. It cuts almost 60% of the weight. removing the glass in favor of one of the PEI coated springsteel sheets would also help, I think anyways.
What’s next
I’d like to get less ghosting on the Y axis, but as stated above that’ll have to wait for that carriage to become available again. I also have plans on converting the X axis to a linear rail as well. I have the rail on hand, I had bought one that was too short for the bed. So I’m trying to laser cut some acrylic to the right template, and still be able to attach the belts. I might just use the bandsaw to cut some 3mm aluminum to the right shape and do some bending and drilling to get things mounted.
I’d also like to pickup a Pallet 2s Pro, as I don’t want to abandon multi material, but dual nozzles just doesn’t seem like a win. I do see some mixed reviews on it though, but if I can get it working I could use it with the Ultimaker once I covert it to 1.75mm. Yea I plan to convert that over once I run through all of my 2.85mm filament.
At this point I might be getting close to the final form of my Franken-CR10S. I’ve been debating on adding some extrusions to “box” the gantry in. This would reduce wobble from the gantry more than my cross member thing and could help tall prints be more successful. This would also make it easier to encase the printer.